


|
Lapbook FoldersI will assemble different examples of lapbook folders and post pictures of them on this page. Lapbooks can be made with just about any type of folder. While having a variety of choices is good it can be difficult to decide what type would be best for your child's current lapbook without having an idea of what the finished project might look like. Additionally, I will post ideas on how to spice up the appearance of the folders and how to store them. For those on a limited budget, my son and I are working on creating templates to make your own folders out of either heavy paper or card stock. Examples of Folders Suitable for Creating LapbooksTwo prime determining factors for choosing a folder type are how elaborate you want the lapbook to be and the space you have available for storage. An inexpensive paper folder can be assembled in a couple of arrangements to either maximize the review potential or to make a comprehensive display of what your child is doing in school but it might not be as eye catching as a hard covered folder or a book based style presentation. On the other hand, a hard covered folder takes up more room and may pose storage problems. Assembling LapbooksMethod OneOne of the simplest ways to assemble a lapbook is into a book like format using two paper folders. Pros of this method: · Simple to assemble · Few supplies · Easy storage of finished lapbook · Built in storage · Expandable Cons of this method: · No side storage To create this lapbook begin by gathering supplies: · Scissors · Two paper folders · Marker 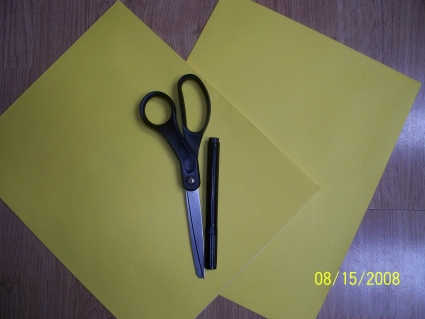
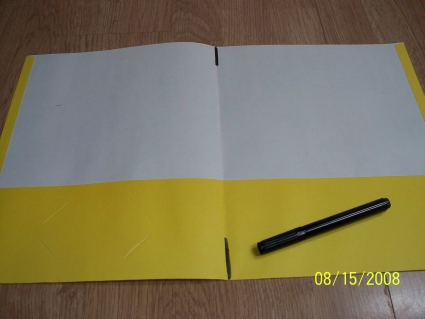
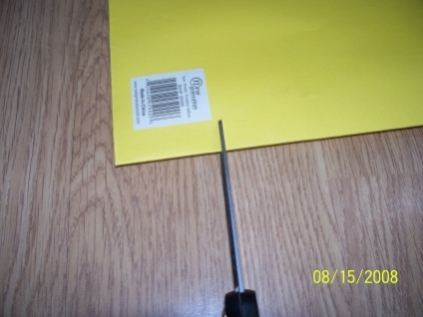
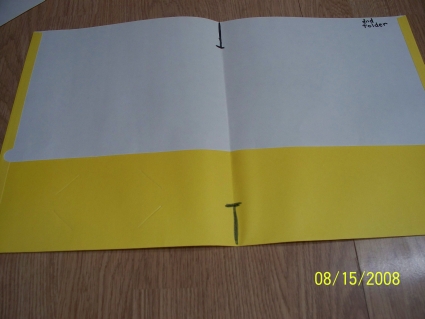
Next open and mark both folders with a line from the bottom and the top that is approximately one to two inches in length.
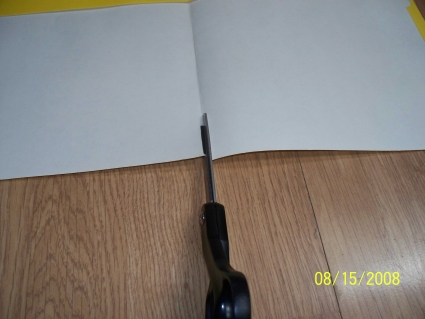
On folder one cut on the marks.
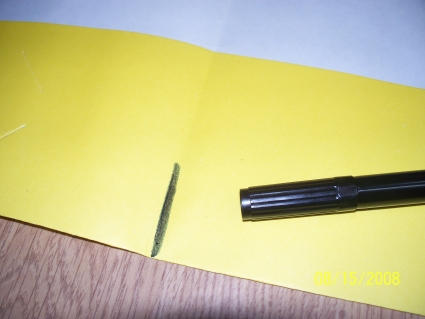
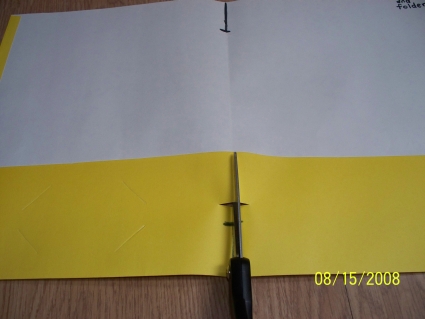
On folder two cut between the marks. To make this easier you can mark your line or a dot on the back side of the folder on the crease. Then cut a small slit at that point. Return to the inside. Insert scissors and cut to the mark.
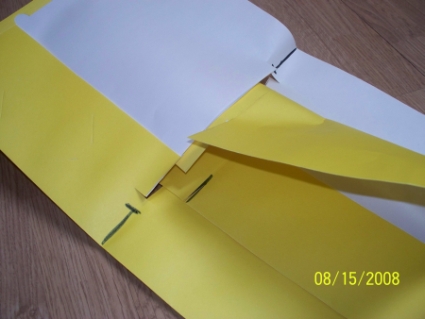
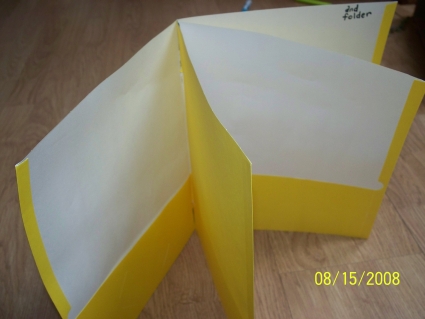
Open folder one and roll it lengthwise. Insert this roll into the center cut of folder two. Unfold folder one. The slits from folder one will coincide with the uncut portions of folder two.
Now you have a lapbook folder ready to be filled with fun facts, diagrams and vocabulary.
Creating Your Own Folders for LapbooksAppearance and Storage of FoldersGo from Lapbook Folders to Lapbook Topics
|
